March 28, 2024
0 Comments
Secure Your Investment: A Foolproof Roof Inspection Checklist
Importance of Regular Roof Inspections
Regular roof inspections are a cornerstone of home maintenance and play a pivotal role in protecting your home, which is often your most significant investment. By incorporating a comprehensive ‘roof inspection checklist’ into your routine, you safeguard your home from potential damage and costly repairs.
Protecting Your Home Investment
Your home is more than just a place to live; it’s a financial asset that requires upkeep to maintain its value. The roof, a critical component of your home’s structure, demands particular attention. Regular inspections can detect minor issues before they escalate into significant problems, thereby preserving the integrity of your home and contributing to its overall longevity.
A well-maintained roof also enhances your home’s curb appeal and can improve its resale value. When considering the array of types of roofing materials available, it’s essential to understand how each requires different maintenance approaches to optimize their lifespan and performance. A routine inspection helps ensure that whichever material your roof comprises remains in prime condition.
Identifying Issues Early
Early detection of roofing issues is imperative to prevent water intrusion, which can lead to structural damage, mold growth, and insulation problems. A thorough roof inspection can pinpoint various forms of deterioration, such as:
- Cracked, curling, or missing shingles or tiles
- Blocked gutters and downspouts
- Compromised flashing around chimneys, vents, and skylights
- Signs of wear on roofing materials
By identifying these concerns early, you can address them promptly, averting the need for more extensive and expensive repairs down the line. Additionally, understanding the signs of roof damage empowers you to take immediate action when needed, potentially extending the life of your roof.
Regular roof inspections are not just about problem detection; they’re about peace of mind. Knowing that your roof is in good condition provides reassurance that your home is secure against the elements. For more insights into maintaining your roof and ensuring its optimal condition, visit our comprehensive roof maintenance guide.
Preparing for a Roof Inspection
Before you embark on a roof inspection, it’s imperative to prioritize safety and ensure that you’re adequately prepared for the task at hand. Conducting an inspection can help you identify potential issues early and maintain the integrity of your roof, ultimately protecting your investment.
Safety First: What You Need to Know
When inspecting your roof, your safety should be the foremost concern. Here are some safety guidelines to adhere to:
- Ladder Safety: Use a sturdy ladder that extends at least three feet over the roofline. Secure the ladder at the base and at the point of roof contact.
- Wear Proper Footwear: Choose shoes with non-slip soles to prevent falls.
- Avoid Wet Surfaces: Never walk on your roof when it’s wet or icy, as the risk of slipping increases.
- Use a Safety Harness: If you must walk on the roof, consider using a safety harness that’s securely attached to a stable fixture.
- Work with a Buddy: It’s best to have someone with you who can steady the ladder and be there in case of an emergency.
For a more in-depth look at how to ensure your safety while on the roof, read our article on roofing safety precautions.
To perform a thorough roof inspection, you’ll need the right tools. The following list should cover the basics:
- Ladder: To safely access your roof
- Flashlight: For inspecting dark or shaded areas
- Safety Harness: To keep you secure if you need to walk on the roof
- Binoculars: To view hard-to-reach areas from the ground
- Notebook and Pen: To take notes on your findings
- Camera or Smartphone: To document any signs of damage
- Measuring Tape: To measure shingle overhang or other elements
- Roof Inspection Checklist: To ensure you cover all necessary points
Here’s a table of tools and their purpose to help keep your inspection organized:
| Tool |
Purpose |
| Ladder |
Access roof |
| Flashlight |
Illuminate dark areas |
| Safety Harness |
Personal safety |
| Binoculars |
View distant details |
| Notebook and Pen |
Record observations |
| Camera/Smartphone |
Visual documentation |
| Measuring Tape |
Take precise measurements |
| Checklist |
Guide inspection process |
Always remember that if you’re not comfortable performing the inspection yourself, it’s advisable to contact a professional. Professionals have the expertise and the equipment to safely and effectively inspect your roof. Learn more about how to select the right expert for the job in our guide on how to choose a roofing contractor.
By taking the necessary precautions and equipping yourself with the proper tools, you’re ready to begin your roof inspection. Take your time to carefully assess the condition of your roof and remember that regular inspections are key to prolonging its life and ensuring the safety of your home.
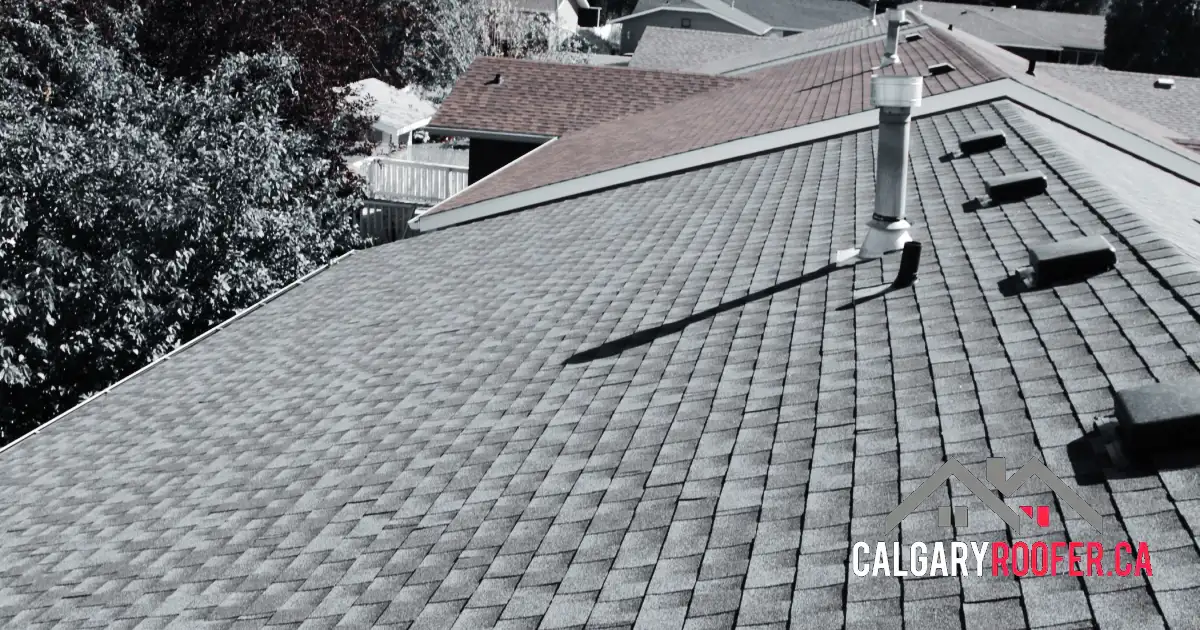
Exterior Roof Inspection Checklist
A thorough examination of your home’s exterior can uncover critical issues affecting the longevity and performance of your roofing system. Here’s a detailed checklist to guide you through inspecting the exterior components of your roof.
Shingles and Tiles: What to Look For
When you assess your roof, pay close attention to the shingles or tiles. Be on the lookout for:
- Cracks and Breaks: This might indicate brittleness due to weather exposure.
- Missing Shingles or Tiles: Gaps can lead to leaks and water damage.
- Curling or Buckling: This can be a sign of poor ventilation or aged shingles.
- Moss or Algae Growth: These can retain moisture and cause underlying damage.
For more information on different types of roofing materials and their maintenance requirements, visit our resource page.
Gutters and Downspouts: Checking for Blockages and Damage
Gutters and downspouts are essential for proper water drainage. Ensure they are:
- Clear of Debris: Leaves and twigs can cause blockages, leading to water overflow.
- Firmly Attached: Loose gutters can allow water to seep into the eaves.
- Rust and Corrosion-Free: Damage can impair their functionality.
- Properly Angled: Gutters should slope towards downspouts for optimal water flow.
Maintaining your gutters is crucial; learn why in our article on the importance of gutter maintenance.
Flashing: Ensuring Proper Sealing
Flashing is used to divert water from areas prone to leaks, such as around chimneys and vents. Check to make sure the flashing is:
- Intact: There should be no cracks or breaks.
- Securely Fastened: It should be firmly adhered to the roof with no gaps.
- Rust-Free: Any rust could mean the flashing is compromised.
Chimneys and Vents: Checking for Obstructions and Wear
Your chimney and ventilation systems play a vital role in maintaining air quality and moisture levels. Inspect them for:
- Obstructions: Bird nests or debris can block airflow.
- Cracked Mortar or Bricks: This could signal structural issues.
- Intact Vent Covers: Ensure they are present and secured to prevent animal entry.
- Wear and Tear: Look for signs of rust or deterioration which may need immediate attention.
If you discover any signs of damage or wear, it may be time to consult a professional. Familiarize yourself with how to choose a roofing contractor to ensure quality repairs or replacements are done.
Remember, early detection of issues during your roof inspection can save you from costly repairs in the future. Always follow roofing safety precautions when performing an inspection, and don’t hesitate to reach out to a professional if you’re uncertain about the condition of your roof. For more extensive issues, explore our roof financing options or consider our roof replacement guide to understand the next steps.
Interior Roof Inspection Checklist
Conducting a thorough inspection of the interior part of your roof is just as important as examining the exterior. This checklist will guide you through assessing the attic space, insulation, and structural components like rafters and beams to ensure your investment remains secure and intact.
Attic Space: Signs of Leaks and Water Damage
When inspecting your attic, it is crucial to look for any signs that indicate leaks or water damage. These can manifest as dark streaks or stains on the underside of the roof or on the walls. Pay attention to any musty odors, which may suggest the presence of mold or mildew resulting from moisture issues.
| Sign to Look For |
Possible Issue |
| Stains on wood |
Water leak |
| Musty odor |
Mold or mildew |
| Damp insulation |
Roof leak |
Check around vents, chimneys, and where the roof planes come together, as these areas are more prone to leaks. If you find any signs of water damage, it’s advisable to consult a professional to determine the extent of the issue. For further guidance, see our article on signs of roof damage.
Insulation: Assessing Efficiency and Moisture
Your roof’s insulation plays a critical role in energy efficiency and protecting against heat loss. When inspecting the insulation, ensure it is evenly distributed and there are no gaps or compressed areas. Look for signs of moisture, as wet insulation loses its insulating properties and can lead to structural damage over time.
| Aspect to Assess |
Desired Condition |
| Distribution |
Even, no gaps |
| Compression |
None |
| Moisture |
Dry |
If your insulation is inadequate or damaged, consider replacing it with eco-friendly roofing materials that offer better energy efficiency and moisture resistance. For more on insulation options, check out our article on energy-efficient roofing options.
Rafters and Beams: Checking for Structural Integrity
The rafters and beams should be free from cracks, rot, and other structural issues. Use a flashlight to examine these elements closely, especially at joints and connection points. Look for any signs of sagging or bending, which may indicate a compromise in the roof’s structural integrity.
| Structural Element |
What to Check For |
| Rafters |
Cracks, rot |
| Beams |
Sagging, bending |
| Joints |
Stability, rust on metal fasteners |
If you notice any problems with rafters or beams, it’s crucial to address these concerns promptly to prevent further damage. It may be necessary to call a professional roofing service to evaluate the situation and recommend the appropriate repairs.
By following this interior roof inspection checklist, you can identify potential issues before they escalate into major problems. Document your findings and take action by either performing DIY fixes for minor issues or seeking professional help for more significant concerns. Regular inspections and maintenance can greatly extend the life of your roof and protect your home. For a comprehensive guide on maintaining your roof, refer to our roof maintenance guide.
Post-Inspection Steps
After you have completed your roof inspection, taking the appropriate post-inspection steps is crucial. You’ll need to document your findings accurately and determine whether to engage a professional roofing service.
Documenting Your Findings
The first step after inspection is to create a thorough record of your observations. This documentation should include:
- Date and time of the inspection
- Weather conditions during the inspection
- Notes on the condition of shingles, tiles, gutters, downspouts, flashing, chimneys, vents, and the interior roof components like insulation, rafters, and beams
- Photographs of any potential issues or areas of concern
- A list of immediate repair needs and areas to monitor over time
Keeping a well-organized record will help you track the aging of your roof and any emerging problems. Should you require professional repairs or want to consider roof financing options, this documentation will be invaluable.
When to Call a Professional Roofing Service
Knowing when to call in a professional roofing service is paramount to maintaining the integrity of your roof. You should consider professional assessment if you notice:
- Multiple missing or damaged shingles or tiles
- Signs of water damage or leaks in the attic
- Large amounts of shingle granules in gutters – a sign of advanced wear
- Sagging areas on the roof, which may indicate structural issues
- Damage to flashing, especially around chimneys and vents
For any concerns that exceed your comfort level or require specialized knowledge, reaching out to a certified roofing contractor is recommended. They can provide a comprehensive evaluation and address issues that could lead to significant damage if left unattended. Consult how to choose a roofing contractor for guidance on selecting a reputable professional.
When considering a professional service, assess the urgency of your needs. Immediate concerns such as active leaks or extensive damage should prompt a prompt call to a roofing specialist. For less urgent repairs, you may have the flexibility to schedule service at a convenient time.
Remember, regular roof maintenance can extend the life of your roof and help prevent unexpected repairs. Periodic professional inspections can also be part of a roof maintenance guide, ensuring that your roof remains in top condition year-round. If you’re unsure of the condition of your roof or if you’ve identified several issues, contact a professional roofing service to secure your investment and peace of mind.
Seasonal and Weather Considerations
Your roof faces different challenges with each season and weather event. Understanding how to prepare for these and what inspection points to focus on can help prolong the life of your roof and prevent costly damage.
Preparing for Winter: Special Inspection Points
Before winter sets in, special attention should be paid to your roof during your inspection. Cold weather can exacerbate existing issues and create new problems if your roof isn’t properly prepared.
- Inspect for Ice Dam Risk: Look for signs that ice dams could form, such as inadequate insulation or ventilation in the attic. Review our guide on how to prevent ice dams on your roof for more information.
- Gutters and Downspouts: Ensure that your gutters and downspouts are clear of debris to prevent ice buildup and water backflow. For further guidance, check the importance of gutter maintenance.
- Shingles Condition: Check for cracked, loose, or missing shingles which can lead to leaks when snow and ice accumulate.
- Ventilation: Proper attic ventilation is crucial to prevent heat from building up under your roof, which can cause snow to melt and refreeze at the edges. See our article on roof ventilation techniques.
| Inspection Point |
Winter Concern |
| Insulation |
Preventing heat loss |
| Ventilation |
Reducing ice dam risk |
| Shingles |
Avoiding leaks from snow/ice |
| Gutters |
Ensuring proper drainage |
After the Storm: Post-Weather Event Inspections
After any significant weather event, such as a storm, it’s important to inspect your roof for any signs of damage.
- Shingles and Tiles: Look for any that have been damaged or dislodged by high winds or falling debris.
- Debris Removal: Safely remove any branches or other debris that may have accumulated on the roof.
- Gutters and Downspouts: Check for and clear out any blockages that could impede water flow.
- Water Damage: Inside your home, check for water stains on ceilings and walls which may indicate a leak. Visit our article on how to spot hail damage on your roof for tips on identifying less obvious issues.
After your post-weather event inspection, document any damage you find and consider contacting a professional for a more thorough examination if needed. If you’re unsure about the extent of the damage or how to proceed, consult our guide on how to choose a roofing contractor for expert advice on finding the right professional for the job.
By keeping these seasonal and weather considerations in mind and incorporating them into your roof inspection checklist, you can ensure your roof remains in optimal condition year-round. Regular inspections and timely maintenance are key to securing your investment and enjoying the peace of mind that comes with a well-protected home.